Notebooks
Requirements before starting to work with Notebooks.
A Jupyter Notebook provides an accessiblservicee interface, merging code execution, text explanations, and visual results, enabling Python programmers to generate interactive and shareable documents.
You can initiate a Notebook through either the UI or the Python SDK.
Using the UI
- Access https://xcloud-app.stochastic.ai
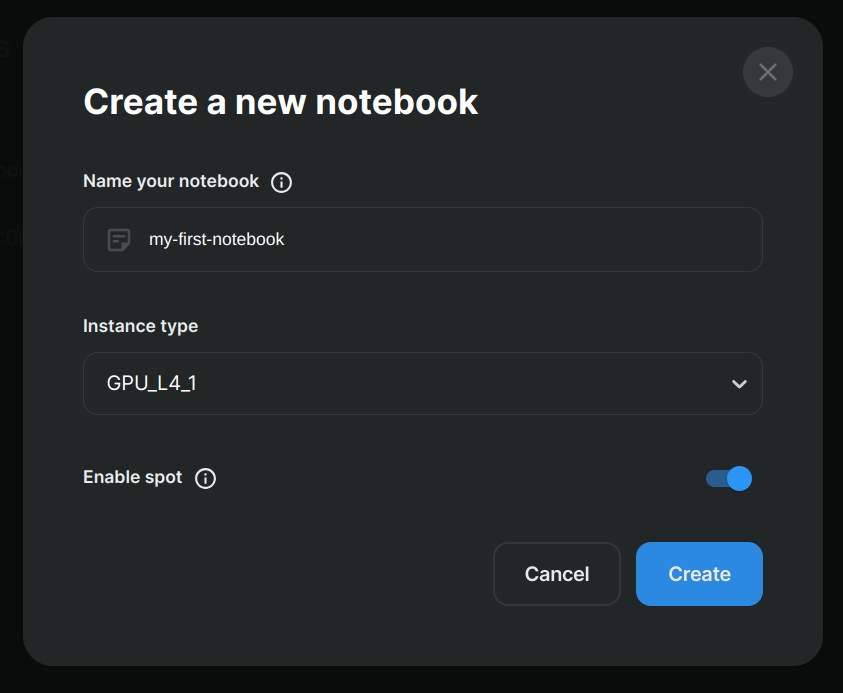
- Go to "Notebooks" (left menu) and click on "Create notebook".
- Provide a name, select the instance type, and specify whether it's a spot or non-spot instance.
Using the Python SDK
Install and authenticate the Python SDK. If you're following this tutorial within a Notebook, we recommend running
xcloud configureto authenticate the Python SDK.Establish the notebook instance, selecting the instance type and whether it's a spot or non-spot instance. For GPU instances, the Docker image already includes CUDA.
from xcloud import Notebook, NotebookContainerSpecs, MachineType
from xcloud import NotebooksClient

notebook_name = "my-first-notebook"

container_specs = NotebookContainerSpecs(
    machine_type=MachineType.GPU_L4_1,
    spot=True
)

# Configure deployment
notebook = Notebook(
    notebook_name=notebook_name,
    container_specs=container_specs,
    location=Location.GCP_US_CENTRAL_1
)

notebook = NotebooksClient.create_notebook(notebook)
To use another workspace instead of using the default one, you can specify it in the NotebooksClient. One example would be
notebook = NotebooksClient.create_notebook(notebook, workspace_id="your_workspace_id")
We are currently supporting the following compute regions:
- Location.GCP_US_CENTRAL_1
- Location.AZURE_EAST_US
- You can await your notebook's readiness using the following command. Typically, it takes 3 - 4 minutes to be ready.
NotebooksClient.wait_until_notebook_is_ready(notebook_name=notebook_name)
- Fetch the notebook access details. Use the
full_urlproperty to access the notebook:
from xcloud import NotebooksClient

notebook = NotebooksClient.get_notebook_by_name(notebook_name)
print(notebook.access_details)

# To obtain more information about the notebook's status, use:
# print(notebook)
A notebook object have the following properties:
- Notebook name: the name must not exceed 30 characters and should consist solely of letters, numbers, and hyphens.
- Workspace ID: identifies the workspace in which the notebook was created.
- Status
- Container specs: define the machine type, instance type (spot or non-spot), Docker image and environment variables.
- Location: specifies the cloud provider and region of instance creation. Currently, only GCP cloud and the us-central1 region are supported, with more regions and cloud providers under development.
- Access details: includes the URL and token required to access the notebook. Clicking on
full_urlredirects you to the notebook instance. - Metadata: contains information related to the creation, cancellation, and deletion of the notebook.
- Upon completing your experimentation, you can either cancel or delete the notebook. Cancelling clears the underlying resources to prevent charges, while deletion removes both resources and the entity. You can cancel or delete a notebook.
# To cancel your notebook
cancelled_notebook = NotebooksClient.cancel_notebook(notebook_name=notebook_name)

# To delete your notebook
# deleted_notebook = NotebooksClient.delete_notebook(notebook_name=notebook_name)